
Last updated on July 22nd, 2024 at 05:05 pm

I love garlic. I basically think that there can never be too much of it. It is the second most used tag on my site, just behind butter. So I’m always looking for new ways to use this flavorful ingredient. So, why not make an easy roasted garlic recipe?
Garlic is a versatile ingredient that adds flavor to many dishes. But how to roast garlic? Roasting garlic with olive oil is an easy way to get a wonderful taste without much effort. This recipe for roasting garlic bulbs made simple is delicious, so if you want to try something new and exciting, keep reading!

Although the full timing for how long to roast garlic including prep and roasting about 50 minutes, most of that time is just sitting in the oven. The end result will be soft and creamy cloves that you can spread on toast, add to sauces and dressings, or combine with a variety of main or side dishes. Plus, it’s a great way to add an extra boost of flavor to your food. So, if you’re looking for a delicious and easy roasted garlic recipe, this one is a must-try!
Simple Ingredients for Roasted Garlic
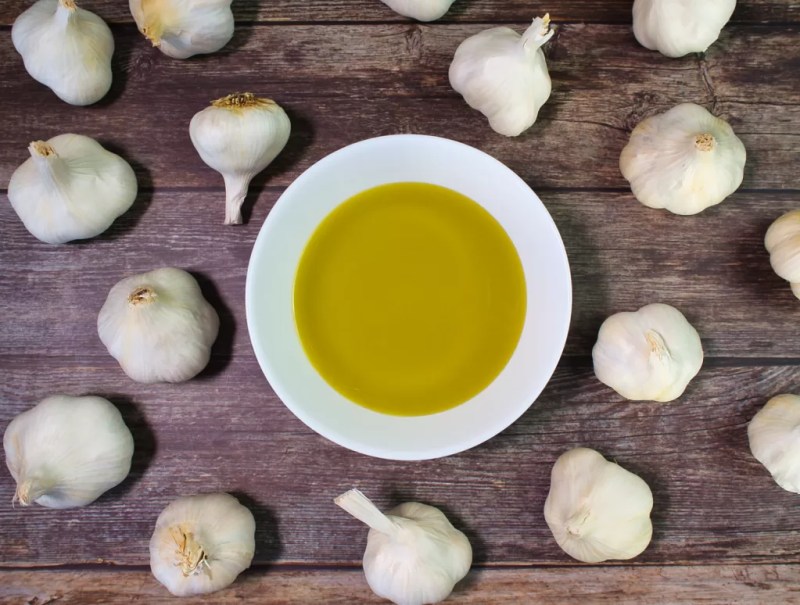
Garlic bulbs and olive oil are all the ingredients you really need for a delicious roasted garlic recipe. A few tools – a muffin tin, aluminum foil, and an oven – will help finish the job. Just drizzle the garlic bulbs in a small amount of olive oil. And voila! You’ll have the most flavorful, garlicky roasted garlic you’ve ever tasted.
Garlic Bulbs
You can’t make roasted garlic without garlic bulbs. When selecting the bulbs for roasting, you’ll want to choose the freshest ones you can find. Look for bulbs that are firm and plump with no signs of mold or softness. I also usually try to find the bulbs with the biggest cloves possible. But that just makes peeling them afterward easier. Small garlic cloves are just more annoying to me.
And luckily before roasting, we don’t need to peel the garlic at all. This is truly roasting garlic bulbs made simple.
Roasting the garlic transforms it into something wholly new. It still has the flavor of garlic, but mellowed out when compared to raw garlic. It will be creamy and slightly sweet due to the caramelization that takes effect while roasting. Not quite as sweet as caramelized onions, but a similar effect.
Olive Oil
Roasted garlic with olive oil also requires some olive oil. And not just any old olive oil will do. You want to get yourself an extra-virgin variety. It has a more intense olive oil flavor that can really add to the taste of the garlic when it’s roasted.
When it comes to using olive oil, you don’t want to skimp, but you also don’t need to drown the garlic. You should use enough to really coat the garlic cloves. Too little olive oil can result in dried-out garlic that won’t have that nice, creamy texture.
Preparing the Garlic
We can’t just coat the papery outside of the garlic with olive oil and hope that gives us roasted garlic bulbs. Some preparation is involved in making sure we get that super creamy and flavorful roasted garlic with olive oil. Luckily it doesn’t take long.

Slice the Garlic Bulbs
With the ingredients out for our easy roasted garlic recipe, let’s get started with the prep work. First, we’ll need to slice the top off of the bulbs.
When slicing the bulbs, we’ll try to cut off as little as possible while also exposing the tops of each clove. This allows the olive oil to get in and do its magic while it sits in the oven. Cut between 1/4-inch and 1/2-inch down from the top of the garlic bulbs. We won’t be roasting the top part we cut off, so it can be discarded. There’s just not enough garlic there to be worth it.
Arrange Garlic in a Muffin Tin
I’ve elected to use muffin tins as the perfect vessel for roasting garlic bulbs made simple. They’re meant for baking, they can hold a lot of individual bulbs in place, and they make it so you need less foil to cover the garlic. I use this Le Creuset muffin tin because it is amazingly non-stick and I got it at one of their factory-to-table sales.
Simply lay the garlic bulbs cut-side up in the muffin tin. One bulb per muffin cup. This will make it quite easy to cook the garlic with the olive oil.

Now that you’ve got your garlic arranged in a muffin tin, all that’s left to do is top them off before we pop them in the oven. If you don’t have a muffin tin, then you can wrap each individual bulb fully in foil – similar to a baked potato. Then just top with olive oil as in the next section before closing up the foil.
Add the Olive Oil
It’s time to add the olive oil to the mix! Drizzle a generous amount of olive oil over the garlic cloves, evenly coating them. This will give them a delicious, savory flavor while helping them cook evenly. Roasting garlic in olive oil is the perfect way to get the most of its flavor. This will help the garlic caramelize and turn a gorgeous golden color.
Drizzle one to two teaspoons of extra virgin olive oil on top of each garlic bulb. Try your best to drizzle it over every clove so they all have relatively even coverage. Some oil will pool at the bottom of the muffin cup.

Top with Foil
Now we’ll be covering the top of the exposed garlic with foil. This is to help prevent the top from overcooking while in the oven.
You may cover the entire top of the muffin tin with a large sheet of foil. But, to save on foil, I’ll be covering each bulb with its own little square. Just tear or cut off a small piece of foil, place it on top of the garlic bulb, and form it to the top so that there isn’t a bunch of empty air between them.
You are now ready to pop the garlic in the oven and watch it transform into a delicious flavor bomb. Or, probably don’t watch it, because it’ll be in the oven for a while.
How Long to Roast Garlic
With everything prepared for roasting garlic bulbs made simple, we’re ready to get to the actual cooking. Start with an oven preheated to 400°F (205°C). With the oven preheated, it’s time to place the muffin tin with the garlic into the oven. And then it is simply down to how long to roast garlic to get perfect results.
Just pop it in, close the oven door, and let it cook. No need to touch it or intervene until the time is up. Roast the garlic cloves for about 40 minutes. This should be enough time to get them nice and golden and even a little bit charred in some areas. As a bonus, you’ll also have the delightful aroma of garlic, making your kitchen smell amazing.


Check the Garlic for Doneness
After reaching the perfect time for how long to roast garlic, it’s time to open the oven door and take a peek. The garlic should be golden brown and the cloves should be soft to the touch, and if it isn’t, you can give it a few more minutes.
To ensure that the garlic cloves are cooked through, you can use a knife to check. If the knife pierces the garlic easily, that means it’s roasted to perfection.
Just make sure to keep an eye on it so it doesn’t burn.
Once you are happy with the doneness, take the muffin tin out of the oven and let the garlic cool down. Now you have some delicious roasted garlic to use!
Using this Easy Roasted Garlic Recipe
Using roasted garlic is one of my favorite ways to add flavor to dishes. It’s a great addition to any meal and will give it a unique flavor. After knowing how long to roast garlic, it now comes down to knowing how to use it best.

Letting the Garlic Cool
Now that your garlic has been roasted to perfection, it’s time to let it cool.
The best way to cool down roasted garlic with olive oil is to simply move it from the muffin tin to a plate or cutting board. If you need to speed up the cooling process, you can pop the plate in the fridge or freezer for a few minutes.
Once the garlic has cooled down enough to handle, you can start separating out the cloves so you can use or store them for later.
Separating the Roasted Garlic Cloves
Once it’s cooled enough to handle, you can either squeeze out the cloves, peel back the papery layers to get to the cloves, or use a fork to remove them. The cloves should come out soft and creamy.
The cloves don’t need to come out cleanly to be enjoyed. Trust me, they taste good no matter how mangled they end up looking. I ended up just peeling out each clove to make sure nothing got lost. But be prepared for your hands to get oily in the process.

Adding Roasted Garlic with Olive Oil to Recipes
You may have something in mind for your roasted garlic already, but below are a few other ideas. Adding roasted garlic to dishes is an easy way to instantly upgrade the flavor, and it can be used in all kinds of recipes.
Try using it with the following recipes:
- Mix into Homestyle Mashed Potatoes
- Make Delicious Garlic Bread
- Use it in Soups like Chicken and Lentil Soup, Butternut Squash Soup, or Rosemary Potato Soup
- Add it to bread dough before baking for a new twist
- Use it to Stuff Steak – I had the most delicious roasted garlic stuffed steak from The Ranch at Las Colinas, so now I need to try to make this at home since I don’t live in Texas any more…
Not only can you add roasted garlic cloves to dishes, but you can also spruce up some of your favorite condiments with them. For example, you can add roasted garlic cloves to a homemade mayonnaise or aioli to add a unique flavor. Or, if you’re feeling adventurous, you can try adding them to a pesto.
Use it to level up your condiments:
- Make a Roasted Garlic Aioli
- Upgrade your Gravy
- Substitute Roasted Garlic for Regular in Homemade Pesto
- Use it in Hummus
- Make a Compound Butter
- Use it in Salad Dressings and other Sauces
You can also use roasted garlic as a spread. It’s a great condiment for sandwiches, pizza, and even tacos. Just mash it up with a bit of butter or olive oil and salt and you’ve got a tasty spread in no time.
So there you have it – there are plenty of ways to make use of your roasted garlic.
Storing Roasted Garlic
Depending on how much roasted garlic with olive oil you’ve made and plan to use, you will likely have some extra. In fact, I usually try to roast a lot of garlic at once
Luckily the cloves will store well in either the fridge or freezer depending on your own timeframe. Just make sure to use it all up before it goes bad because it would be such a shame to waste any of this roasted gold flavor.

Place in an Airtight Container
Storing the roasted garlic in an airtight container will help it last longer. and you can enjoy roasted garlic in more things. I’ve got a few tips to make sure it’s stored properly.
Use any airtight container – from ziploc bags, to tupperware, to glass mason jars and more. I really love my glass storage containers for leftovers or extras. Use ziploc bags or vacuum-sealed bags when freezing your roasted garlic.
Next, make sure the lid fits or seals snuggly. More air will cause it to spoil quicker. And make sure it’s still tight after every time you use it.
Finally, consider labeling the container – especially if it is going into the freezer. That way, you’ll know exactly what’s inside and when it was stored. It’s never good to pull something out of the freezer and it is an unknown item from who knows how long ago.
Refrigerate or Freeze the Roasted Garlic
Refrigerate or freeze your roasted cloves to keep them around for longer. It’s important to remember that the roasted garlic won’t last forever.
If you’re planning to use it within a few days, put it in an airtight container and refrigerate it. To get the most out of your garlic, it’s best to use it within a week of being refrigerated. But if you’re looking to store it for longer, freezing is the way to go.
Freezing roasted garlic is actually quite simple. All you need to do is place the cloves in a ziploc bag. Make sure to push out as much air as possible and then seal the bag. Label and date the bag, and then place it in the freezer. Frozen roasted garlic will keep up to three months.
When you’re ready to use the frozen garlic, you can thaw it out in the refrigerator for a few hours. Or, if you’re like me, just break off as much as you need, mince it, and toss it in a pan to start off my recipe.
So next time you’re looking for something special, try this recipe for roasting garlic bulbs made simple!
How did yours turn out?
I’d love to hear when you try out this easy roasted garlic recipe! Take a pic of your food and share your success with me by adding it to your Instagram stories or feed, and tagging me @doyouroux, or by using #doyouroux.
Plus, leave a rating to let me know how you liked the recipe. It helps me out a lot to know how things worked out… or didn’t.
How to Roast Garlic with Olive Oil
Course: Condiment, IngredientDifficulty: Easy8
servings15
minutes40
minutes55
minutesLearn how to make this easy roasted garlic recipe with olive oil for the perfect delightfully creamy mellow garlic flavor.
Ingredients
Whole garlic bulbs
1 to 2 teaspoons olive oil per bulb
Directions
- Preheat the oven to 400°F (205°C)
- Slice the tops off of the garlic bulbs, about 1/4 to 1/2-inch down
- Place each garlic bulb in the cup of a muffin tin and drizzle 1 to 2 teaspoons of olive oil over each bulb
- Cover each bulb with a square of aluminum foil
- Put the muffin tin into the oven and bake for 40 to 45 minutes
- Remove the garlic from the oven, let it cool enough to handle, separate the garlic cloves, and use immediately or store in the fridge or freezer for later use
Get recipes like this straight to your inbox:


